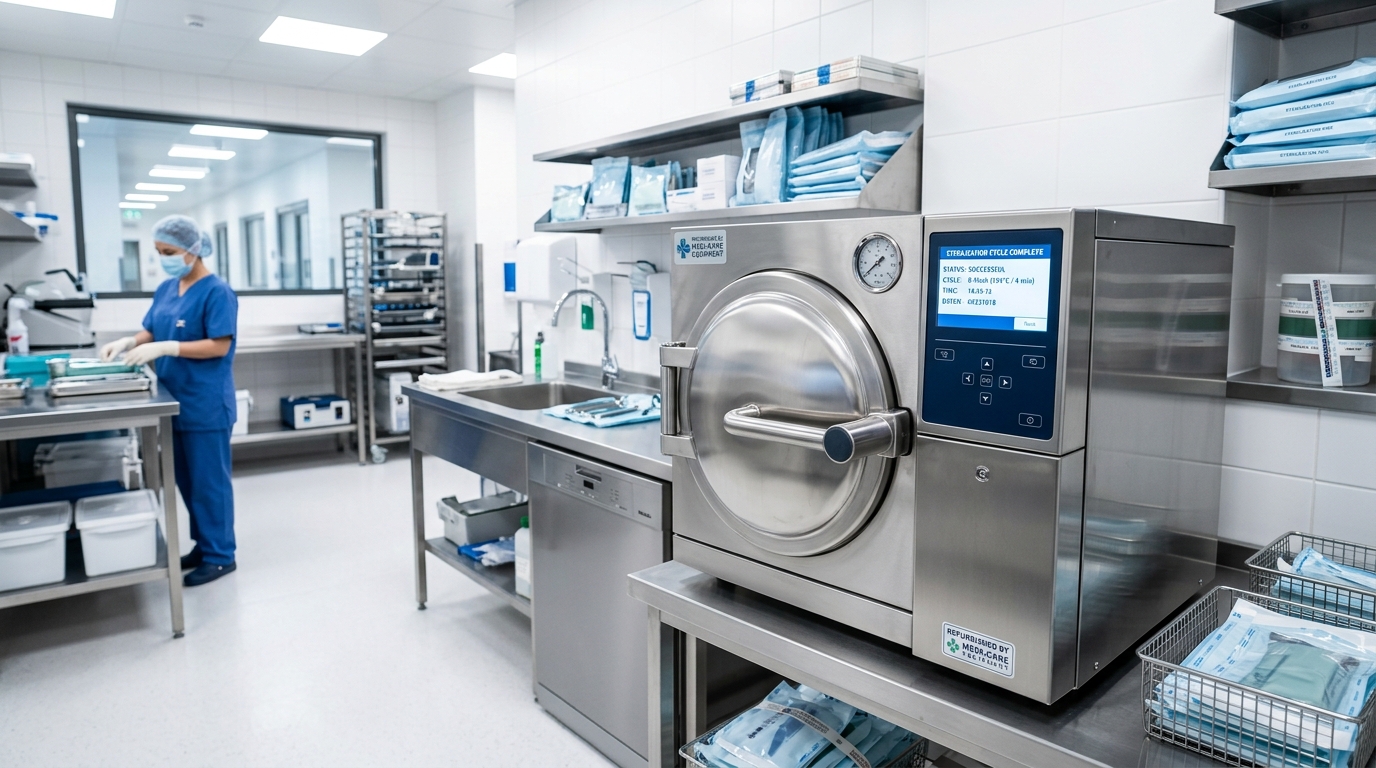
The Refurbished Autoclave Buying Guide: How to Save Money Without Compromising Sterilization Safety In a dental clinic, if the patient chair is the face of your practice, the autoclave is the absolute shield. Sterilizers are non-negotiable pieces of infrastructure; without them, patient safety collapses, infection control protocols stall, and instruments stay dirty, bringing your entire daily schedule to a dead stop. But outfitting a modern operatory is an expensive venture. When looking to replace or add a sterilizer, purchasing a brand-new, top-tier model can easily demand $6,000 to $9,000+ of your capital budget. This financial hurdle is why more practice managers are turning to the refurbished market. However, because this equipment handles extreme heat, high pressure, and critical biological safety, you cannot afford to buy blindly from a generic online liquidator. Because we have been overhauling, servicing, and supplying wholesale parts for dental equipment since 1968, we’ve put together the ultimate technical guide on exactly what to look for when buying a refurbished autoclave to protect your clinic’s budget and your patients. 1. Vetting the Rebuilder: “Cleaned” vs. Truly Refurbished The most important rule of buying pre-owned dental equipment is understanding who did the work. There is a massive, dangerous difference between a machine that has simply been wiped down with a surface disinfectant and one that has been mechanically remanufactured. When evaluating a refurbished sterilizer, ask the supplier for an explicit breakdown of their rebuilding process. A true technical overhaul must include: 2. Choosing the Right Class: B-Class vs. S-Class Not all autoclaves process instruments the same way. You must select the right sterilization class based on your clinic’s specific handpiece and instrument loadout. 3. Demanding the Testing Logs Never accept a refurbished autoclave unless the seller can provide documented physical proof of successful diagnostic cycles. Before a machine leaves a technician’s bench, it should undergo rigorous load and pressure stress testing. Ensure your supplier provides: The Smart Savings Checklist Buying refurbished is an incredibly smart way to cut practice overhead, provided you buy from a specialist team who can guarantee the integrity of the machine. Checkpoint What to Look For Why It Matters Warranty Coverage Minimum 6 to 12 months on parts Protects you against early component failure Brand Reputation Industry staples like Midmark, Tuttnauer, or Pelton & Crane Parts remain universally accessible for future servicing Chamber Integrity Zero pitting, deep scratches, or structural rust Prevents structural pressure failures down the line Secure Your Clinic’s Safety A refurbished autoclave shouldn’t feel like a gamble. When sourced from a trusted technical provider, an overhauled sterilizer will deliver the exact same clinical safety and performance as a brand-new unit, while saving your practice thousands of dollars in capital expenditure. At Michigan Dental Chair Repair & Wholesale, our factory-trained technicians meticulously break down, rebuild, and biologically test every pre-owned sterilizer we offer. Ready to upgrade your sterilization center affordably? Browse our currently available refurbished inventory and premium wholesale replacement parts at dentalchairrepair.com, or contact our Waterford Township shop directly at 248-290-9910to speak with a sterilization equipment specialist!
Case Study: The Cost of Neglected Utilities – Saving a Clinic from a Sudden Air Compressor Collapse
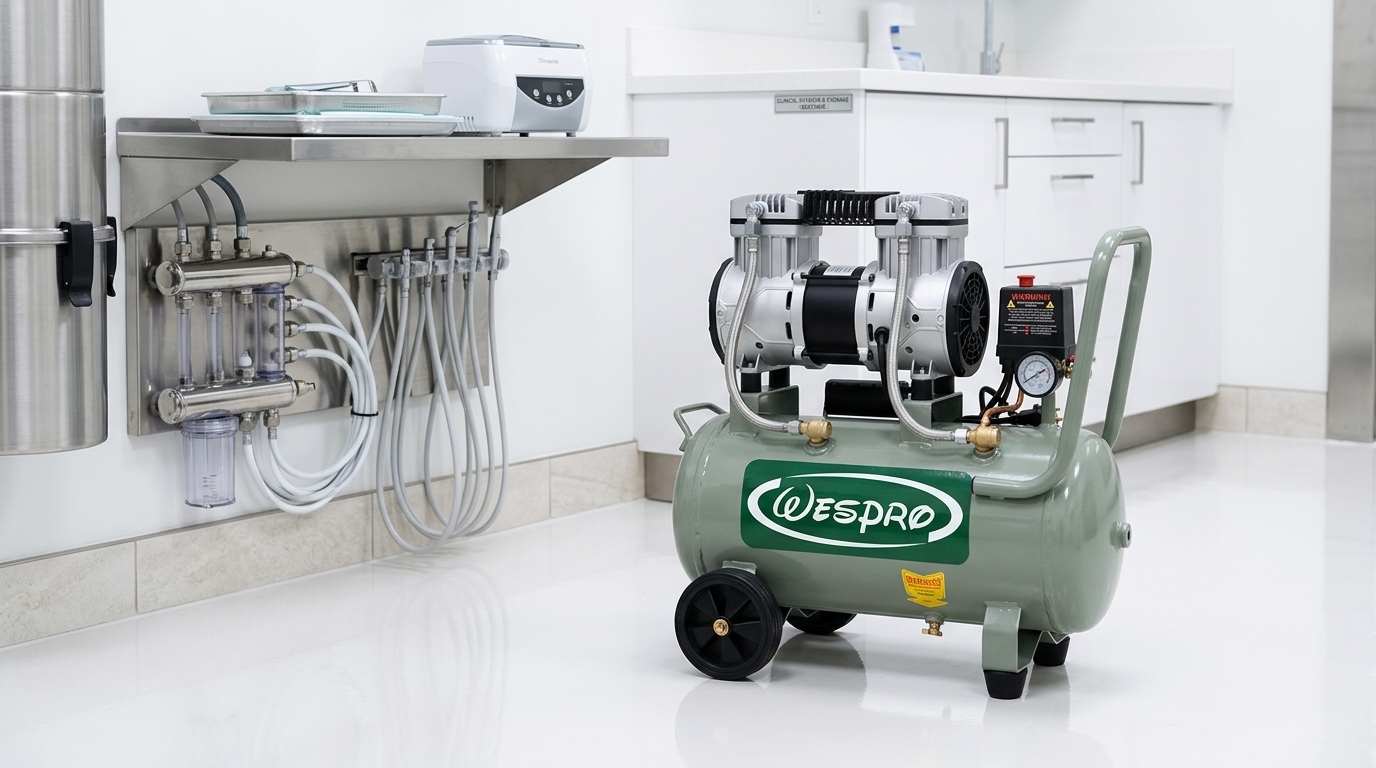
Case Study: The Cost of Neglected Utilities – Saving a Clinic from a Sudden Air Compressor Collapse In a dental clinic, the operatories get all the glory. The high-tech chairs, digital sensors, and sleek delivery units are what patients see. But hidden away in a utility closet or basement is the true beating heart of the entire practice: the dental air compressor. When a dental chair goes down, you lose one room. When your air compressor goes down, your entire practice closes instantly. Recently, a fast-growing clinic reached out to our Waterford Township workshop in a panic. Their dental utility system had suffered a sudden, total pressure collapse right in the middle of a busy morning shift. Here is how our field service technicians diagnosed the issue, got their practice back online, and the critical maintenance lesson that saves thousands in unnecessary equipment replacement costs. The Crisis: Zero Air Pressure on the Delivery Line The clinic called our emergency line reporting that their handpieces were losing torque before cutting out completely. Within minutes, the pressure gauges on every single delivery unit dropped to zero. When our technician arrived at the practice, the utility closet was filled with a distinct burning metallic smell, and the compressor unit was completely unresponsive. Upon tearing down the utility head, we uncovered a cascading chain of failures: The Technical Solution: Precision Overhaul vs. Forced Replacement Many corporate equipment distributors would look at a seized motor and immediately push the clinic to purchase a brand-new $6,000+ utility system, resulting in days of shipping delays and lost practice revenue. Because we have specialized in wholesale components and precision repairs since 1968, our team took a smarter, faster approach: 1 Isolate and Depressurize the System Safety Priority Our tech safely cut the main electrical breakers and completely purged the residual hydraulic and pneumatic pressure from the main holding tanks to prevent valve damage. 2 Rebuild the Compressor Pump & Motor Precision Engineering Instead of scraping the machine, we pulled the seized pump assembly, replaced the burnt electrical components, installed heavy-duty bearings, and restored smooth mechanical rotation. 3 Purge and Sanitize the Storage Tank Moisture Removal We cleared the corrupted auto-drain lines and evacuated gallons of stagnant water from the main tank, completely drying the internal chamber to eliminate the threat of line contamination. 4 Replace Filtration & Drying Elements Pneumatic Protection We installed premium, high-capacity desiccant drying refills and brand-new intake filters, ensuring that only pure, 100% dry air entered the clinic’s master delivery lines. The Vital Lesson: The “Five-Second” Maintenance Check The entire shutdown could have been entirely prevented by a routine maintenance check that takes less than five seconds. While modern dental air compressors feature “automatic” moisture purge systems, these mechanical purge valves eventually clog due to mineral deposits. If your staff isn’t performing a manual tank drain check at least once a week, water accumulates inside the tank. This reduces your air storage capacity, forces the motor to cycle constantly, and ultimately burns out the system. The Cost of Neglect vs. Proactive Care Emergency Repair & Downtime Cost Thousands in lost production + rush technical labor Weekly Maintenance Cost 0$ (5 seconds of staff time to check the drain line) Equipment Lifespan Impact Cut in half by moisture corrosion and continuous running Keep Your Clinic’s Heart Beating Don’t wait for a burning smell or an empty pressure gauge to find out your utilities are failing. Implementing a structured preventative maintenance schedule for your compressor and vacuum systems is the absolute best insurance policy against sudden practice closures. Whether you need a rapid emergency field repair, routine system servicing, or high-quality wholesale replacement filters and valves, the team at Michigan Dental Chair Repair & Wholesale has your back. Keep your practice running smoothly—explore our complete utility parts selection at dentalchairrepair.com, or speak directly with a senior technician at 248-290-9910 to book a comprehensive utility inspection today!
Meeting Compliance: The Complete Dental Unit Waterline Maintenance Checklist
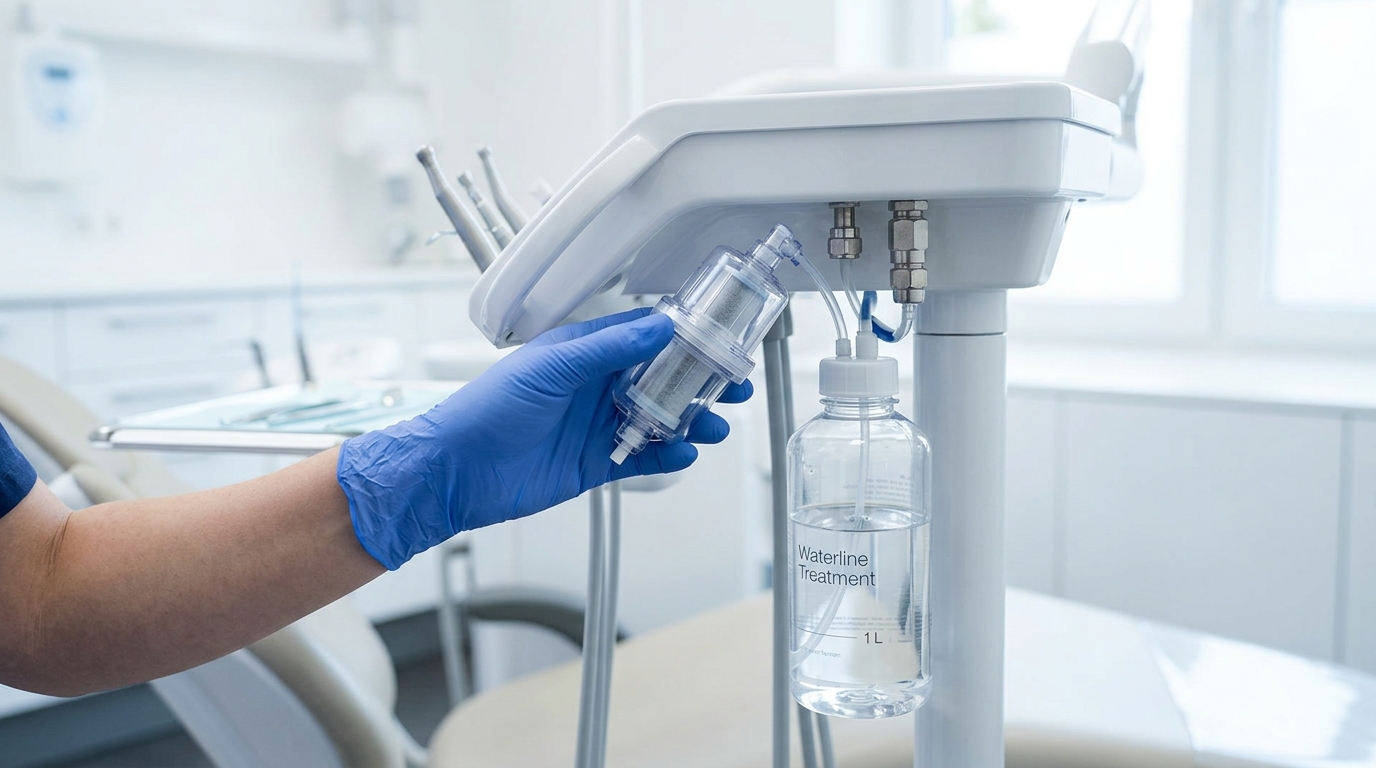
Meeting Compliance: The Complete Dental Unit Waterline Maintenance Checklist Maintaining clean dental unit waterlines (DUWLs) is no longer just a best practice—it is a strict regulatory necessity. Because dental lines are narrow, flexible, and subject to stagnant water conditions overnight, they are the perfect breeding ground for microscopic biofilms. If left unmanaged, these biofilms can shed bacteria directly into your patient delivery systems, failing safety inspections and putting vulnerable patients at risk. At Michigan Dental Chair Repair & Wholesale, we don’t just fix the structural mechanics of your chair; we help you protect the vital infrastructure running through it. Based on current safety guidelines, here is your straightforward, step-by-step clinic checklist to ensure your water lines stay completely clear, compliant, and safe. 1. The Daily Protocol: Purging the Lines Biofilm thrives when water sits completely still. A simple daily purging routine drastically reduces structural bacteria buildup. 2. The Weekly Protocol: Treatment & Shocking Flushing alone will not strip away an established, sticky biofilm matrix. You need active chemical treatment. 3. The Quarterly Protocol: Independent Testing You cannot manage what you do not measure. The only way to prove compliance to inspectors is through documented testing. Protecting Your Valves and Solenoids An overlooked benefit of clean waterlines is equipment longevity. When thick biofilm or mineral scaling builds up in your lines, it breaks loose and migrates down the system, jamming the tiny, precision copper solenoid valves and water relays inside your chair’s delivery head. Maintaining clean lines saves your clinic from both compliance headaches and expensive plumbing repair bills. Looking to optimize your utility layout or need wholesale maintenance supplies? The team at Michigan Dental Chair Repair & Wholesale has been keeping Waterford Township practices running safely since 1968. Browse our full online inventory of replacement valves, tubing, and maintenance parts at dentalchairrepair.com, or call our technical line directly at 248-290-9910 for field service support!
Operatory Modernization: How Dental Chair Re-Upholstery Transforms Your Patient Experience
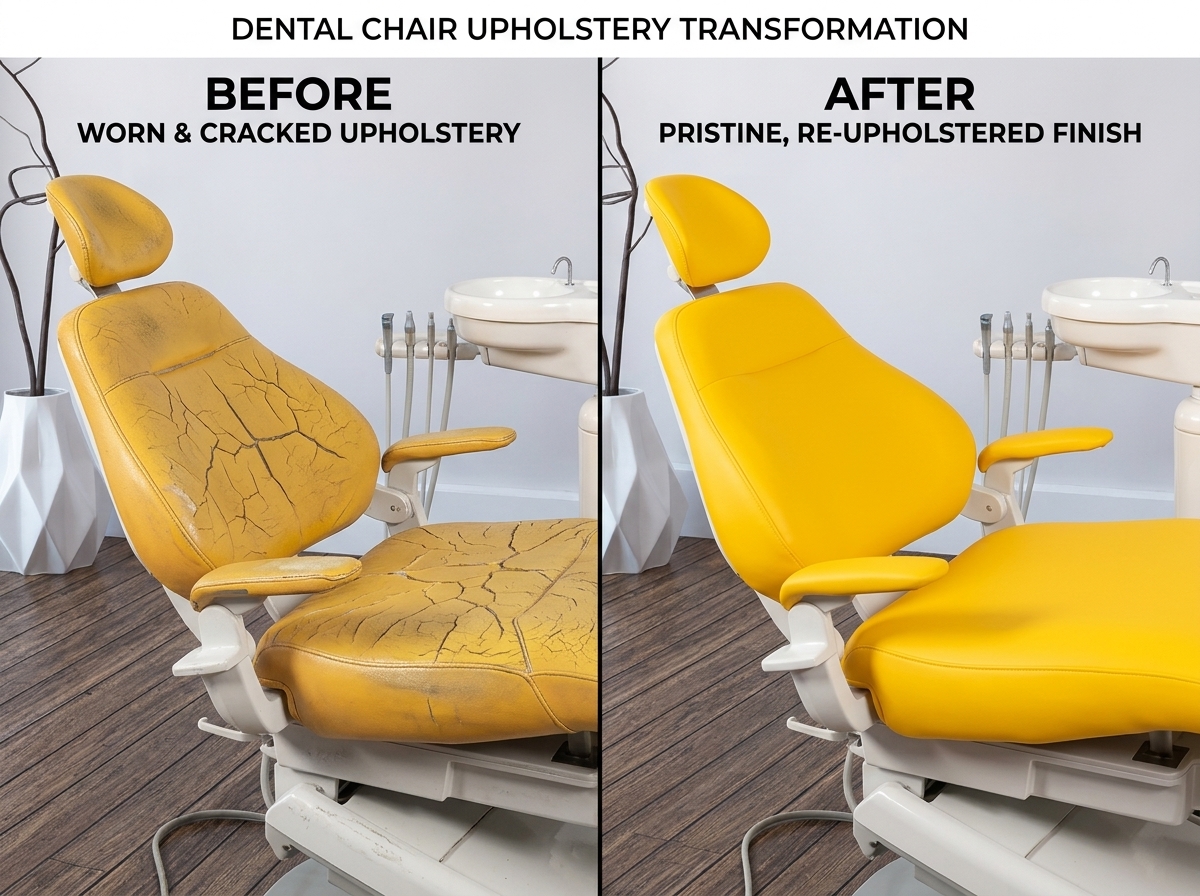
Operatory Modernization: How Dental Chair Re-Upholstery Transforms Your Patient Experience In a modern dental practice, clinical excellence is only half the battle. The other half is patient perception. Before a patient ever opens their mouth for an exam, they are scanning your operatory, making subconscious judgments about your clinic’s cleanliness, technology, and level of care. The absolute focal point of that visual scan? Your dental patient chair. If your chair is sporting cracked vinyl, visible seams worn down by chemical disinfectants, or sagging foam that makes a 45-minute hygiene appointment feel like an endurance test, it sends the wrong message. But you don’t need to replace a perfectly functioning, multi-thousand-dollar mechanical unit just to fix a cosmetic issue. Here is how a professional re-upholstery upgrade completely transforms your patient experience and modernizes your practice environment. 1. Erasing the Aesthetic “Red Flags” Dental operatory surfaces face a brutal daily routine. Strong surface disinfectants are necessary for infection control, but over time, they strip the essential plasticizers out of standard vinyl. The result? Material that becomes stiff, brittle, and eventually cracks. Cracked upholstery isn’t just an eyesore; it’s a clinical liability. Tiny tears in the fabric act as micro-harbors for moisture and debris, making it incredibly difficult to properly sanitize. A seamless, high-grade medical upholstery upgrade instantly restores a pristine, hygienic, and premium look that reassures anxious patients the moment they walk through the door. 2. Upgrading to Ergonomic Support Patient anxiety in the dental chair is deeply tied to physical comfort. When old foam padding flattens out, patients end up resting directly against the rigid internal metal or plastic plate structure of the chair. This creates pressure points in the lower back and neck, causing patients to constantly shift, adjust, and grow increasingly restless during procedures. During a professional restoration, the old, compressed foam is entirely replaced with multi-layered, high-density memory or antimicrobial foam. Sculpted lumbar supports and contouring headrests help keep the patient perfectly positioned and relaxed, making your job easier and their visit infinitely more pleasant. 3. The Power of Color Psychology in Modern Design If your clinic is still rocking the standard dusty mauve, teal, or muted beige of the early 2000s, an upholstery refresh is your fastest ticket to a modern aesthetic. Modern dental design relies heavily on calming, professional color palettes. Swapping out dated tones for contemporary grays, deep navies, or slate blues can instantly make an older operatory feel clean, high-tech, and open. It allows you to match your physical equipment to your modern website and branding seamlessly. High-End Upgrades Without the Capital Shock Replacing a fully operational premium dental chair purely for cosmetic reasons is an incredibly expensive way to update a room. Choosing a specialized, professional upholstery restoration allows you to completely customize the look, feel, and comfort of your existing chairs while keeping your capital expenditure low. At Michigan Dental Chair Repair & Wholesale, our master upholstery technicians handle everything from simple cover replacements to complete custom ergonomic foam sculpting right here in our Waterford Township workshop. Ready to elevate your operatory’s visual appeal and patient comfort? Explore our custom restoration options at dentalchairrepair.com, or chat with our styling and technical team directly at 248-290-9910 to get a custom quote for your practice!
The Dental Equipment Parts Guide: Smart Ways to Cut Supply Overhead Without Sacrificing Quality
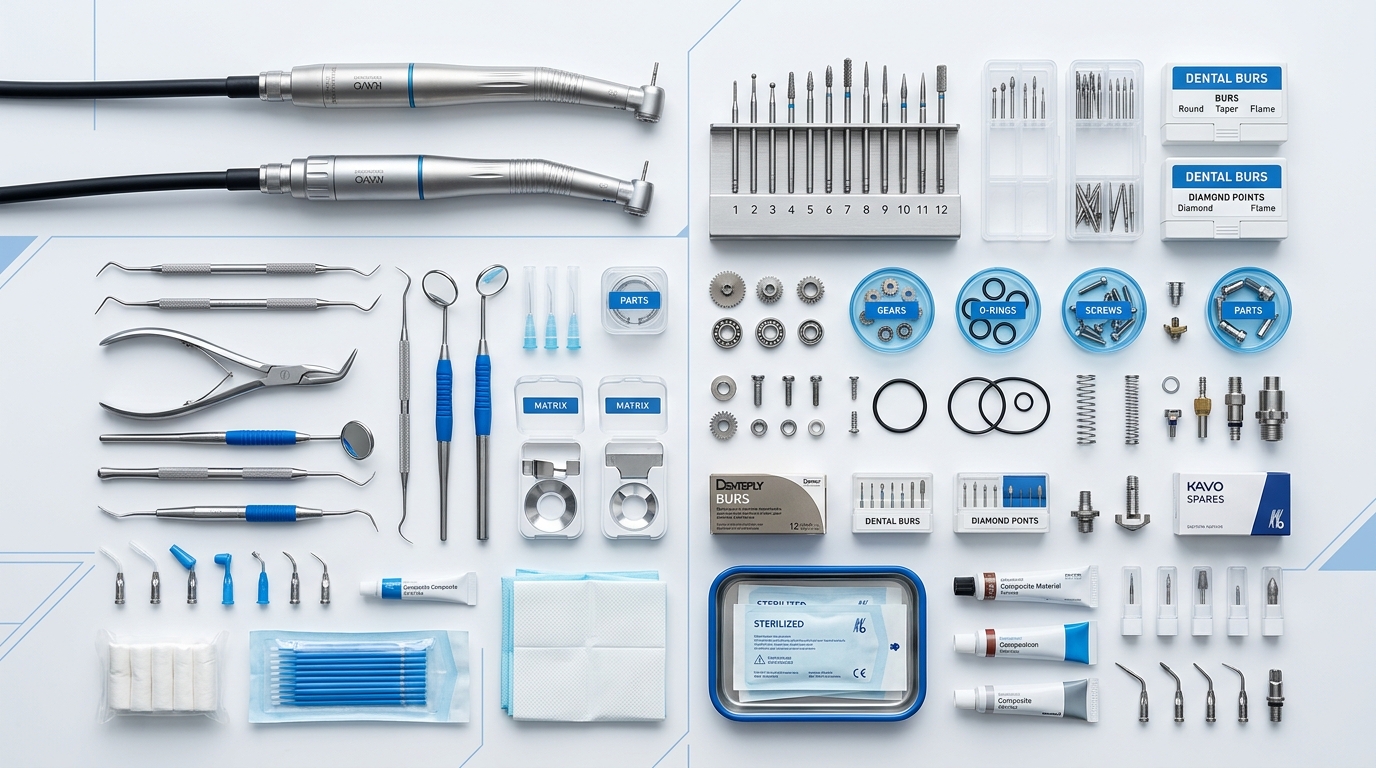
The Dental Equipment Parts Guide: Smart Ways to Cut Supply Overhead Without Sacrificing Quality Managing a successful dental practice requires keeping a close eye on operational overhead. When a critical component on a delivery unit, compressor, or vacuum system wears out, the default reaction for many office managers is to immediately purchase an identical, branded Original Equipment Manufacturer (OEM) part. While certain high-precision components strictly demand factory-original replacements, utilizing high-quality aftermarket dental parts can save a practice thousands of dollars annually without compromising patient safety or clinical performance. Because our family-owned shop has spent decades sourcing both wholesale and replacement parts, we understand exactly when you should pay a premium for OEM, and when an aftermarket choice is actually the smarter business move. OEM vs. Aftermarket: Understanding the Difference When to Choose Aftermarket Parts (The Smart Savings) For high-wear, standard utility components, premium aftermarket parts are frequently identical in performance to their OEM counterparts, but cost 30% to 50% less. 1. Standard Valves, Tubing, and O-Rings Pneumatic blocks, foot control microswitches, block gaskets, and silicone handpiece tubing are standardized across the manufacturing industry. High-quality aftermarket alternatives use the exact same medical-grade polymers and tensile strengths as branded parts, making them an absolute no-brainer for routine maintenance saves. 2. Solids Traps, Filters, and Evacuator Tips Suction filters, canister O-rings, and disposable or semi-disposable vacuum parts are designed to be swapped out frequently. Paying a brand-name premium for simple plastic molded traps or standard disposable components adds unnecessary bleed to your monthly supply budget. 3. Foot Controls and Syringe Components Standard three-way syringe buttons, repair kits, and universal foot control pedals are highly compatible across major equipment brands. Sourcing these from a reputable wholesale distributor ensures longevity while preserving your clinic’s cash flow. When You Should Absolutely Stick to OEM To protect your investments and ensure total clinical precision, we always recommend sticking strictly to factory OEM parts for these specific systems: Optimize Your Supply Procurement The secret to lowering your overhead isn’t buying the cheapest part available on the internet—it’s partnering with a trusted technical supplier who can verify part compatibility and guarantee the components they sell. At Michigan Dental Chair Repair & Wholesale, we bridge the gap. We maintain a curated wholesale inventory of both premium OEM and vetted aftermarket replacement parts to help your practice run efficiently, safely, and affordably. Explore our full parts store at dentalchairrepair.com, or reach out directly to our parts specialists at 248-290-9910 to find the exact, cost-effective match for your operatory equipment!
Case Study: Restoring a Classic Dental Chair to Showroom Quality (Without the New Chair Price Tag)
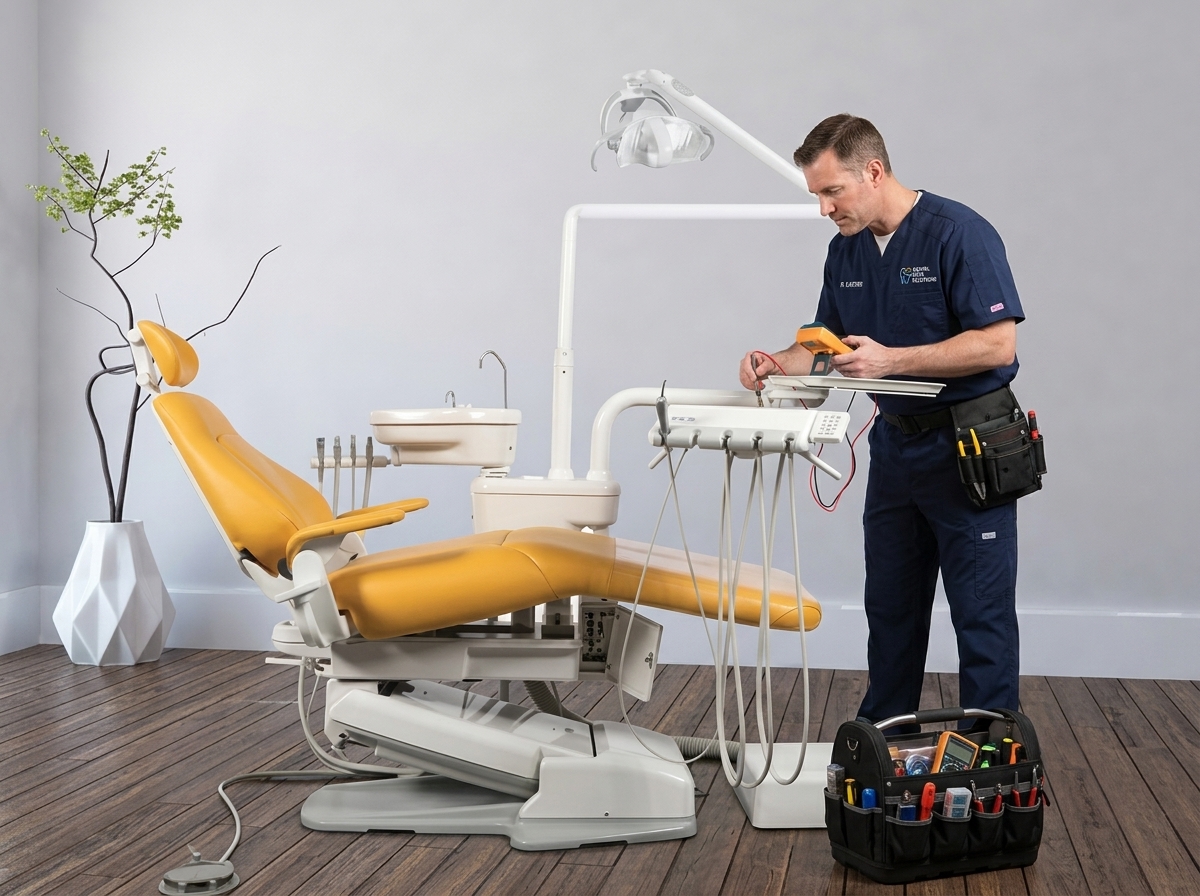
Case Study: Restoring a Classic Dental Chair to Showroom Quality (Without the New Chair Price Tag) When a premium dental chair begins to show its age, many practices assume their only option is to drop $10,000 to $15,000+ on a brand-new replacement unit. But in our decades of serving dental clinics, we have found that older, classic models often possess incredibly robust, heavy-duty mechanical skeletons that outperform newer, plastic-heavy models. Recently, a local clinic brought a worn-out, structurally sound patient chair into our Waterford Township workshop. It was mechanically functional but aesthetically failing, causing patients discomfort and dragging down the visual appeal of the operatory. Here is how we completely overhauled, re-upholstered, and restored this clinic workhorse to showroom condition for a fraction of the cost of buying new. The Challenge: A Mid-Life Crisis for a Clinic Workhorse The incoming chair had spent over a decade in a high-volume practice. While the hydraulic pump and structural base were still working smoothly, the chair was suffering from severe wear and tear that impacted patient perception: Our Restoration Process: Step-by-Step Step 1: Complete Teardown and Mechanical Inspection We don’t just put a new cover over old problems. Our technicians stripped the chair completely down to its bare metal frame. We thoroughly inspected the internal hydraulic cylinders, flushed the old fluid, checked the solenoid valves for micro-leaks, and lubricated all primary pivot points to ensure the chair operated silently. Step 2: Custom Ergonomic Re-Foaming To fix the sagging support, we stripped away the degraded factory foam. Our upholstery team hand-shaped brand new, high-density antimicrobial foam layers. We added built-in lumbar contours to maximize patient relaxation, transforming a stiff, uncomfortable seat into an ergonomic experience. Step 3: Premium Seamless Upholstery Upgrade The clinic opted for a premium, medical-grade vinyl engineered specifically to withstand modern surface disinfectants without cracking. We executed a seamless upholstery wrap in a modern charcoal gray, giving the chair a sleek, contemporary profile that instantly modernized their operatory layout. Step 4: Cosmetic Detailing and Refinishing Finally, we sanded down, primed, and color-matched the scuffed base castings and armrests with a durable, scratch-resistant industrial coating, removing every trace of its previous ten years of heavy use. The Results: Showroom Quality, Massively Reduced Capital Expense The transformation was night and day. The chair returned to the clinic looking, feeling, and operating exactly like a brand-new unit fresh off the factory floor. Metric Brand New Replacement Chair Our Complete Restoration Project Total Turnaround Time Weeks of manufacturing/shipping delay Handled swiftly to minimize clinic downtime Visual / Comfort Level Modern, premium aesthetic Identical modern aesthetic & brand new foam Financial Investment $10,000 – $15,000+ Saved thousands in clinic capital expenditure By investing in restoration rather than replacement, the practice saved thousands of dollars in capital expenditure—budget they were able to redirect toward upgrading their imaging technology. Is Your Reliable Chair Looking Tired? If you have a reliable dental chair that still has plenty of mechanical life left but is hurting your clinic’s image or patient comfort, a professional overhaul is the ultimate cost-effective solution. At Michigan Dental Chair Repair & Wholesale, we’ve been bringing equipment back to life since 1968. Visit dentalchairrepair.com to view more of our work, or call us directly at 248-290-9910 to get an accurate estimate on a custom upholstery or mechanical restoration project for your practice!
The “Dead” Dental Chair: 3 Quick Checks Before You Call a Technician
The “Dead” Dental Chair: 3 Quick Checks Before You Call a Technician Every dental office manager or practitioner knows the sinking feeling. You have a full schedule of patients waiting, your first appointment is settled in, you hit the foot pedal—and absolutely nothing happens. The chair is completely dead. Before you pick up the phone for an emergency service call-out (and face the resulting practice downtime), there is a distinct difference between a catastrophic component failure and a simple, fixable issue. Because we have been repairing, overhauling, and supplying wholesale dental parts since 1968, we’ve learned that a massive percentage of “dead chair” emergency calls can be solved in less than five minutes by checking three basic components. Here is your quick-fire diagnostic checklist to run through before you call a technician. Check 1: The Master Toggle Switch (and Hidden Cut-Offs) It sounds incredibly obvious, but you would be amazed at how often a chair is “restored to life” simply by flipping a switch. Check 2: The Main Infrastructure (Compressor & Power Strips) A dental chair relies on a delicate balance of electrical power and pneumatic (air) pressure to operate. If one of these utility lines fails at the source, the chair stays grounded. Check 3: The Internal Main Fuse If the wall outlet has power but the chair’s status lights are completely dark, a blown fuse is the absolute number one suspect. Fuses are intentionally designed to “die” to protect the expensive main circuit boards from electrical surges. Roson Dental When It’s Time to Call in the Experts If you have verified the power outlet, cleared the safety plates, checked the compressor pressure, and verified the fuse is intact—but the chair still won’t respond—you are likely dealing with a failed foot control cable, a damaged solenoid valve, or a malfunctioning main control board. Roson Dental Attempting to deep-dive into high-voltage wiring or complex hydraulic lines without proper training can void your manufacturer warranties or risk creating serious electrical hazards. Need a fast fix or looking for specific replacement wholesale parts? The team at Michigan Dental Chair Repair & Wholesale is here to keep your clinic operational. Browse our online parts inventory at dentalchairrepair.com, or reach out to our technical repair team directly at 248-290-9910 to schedule professional field service!
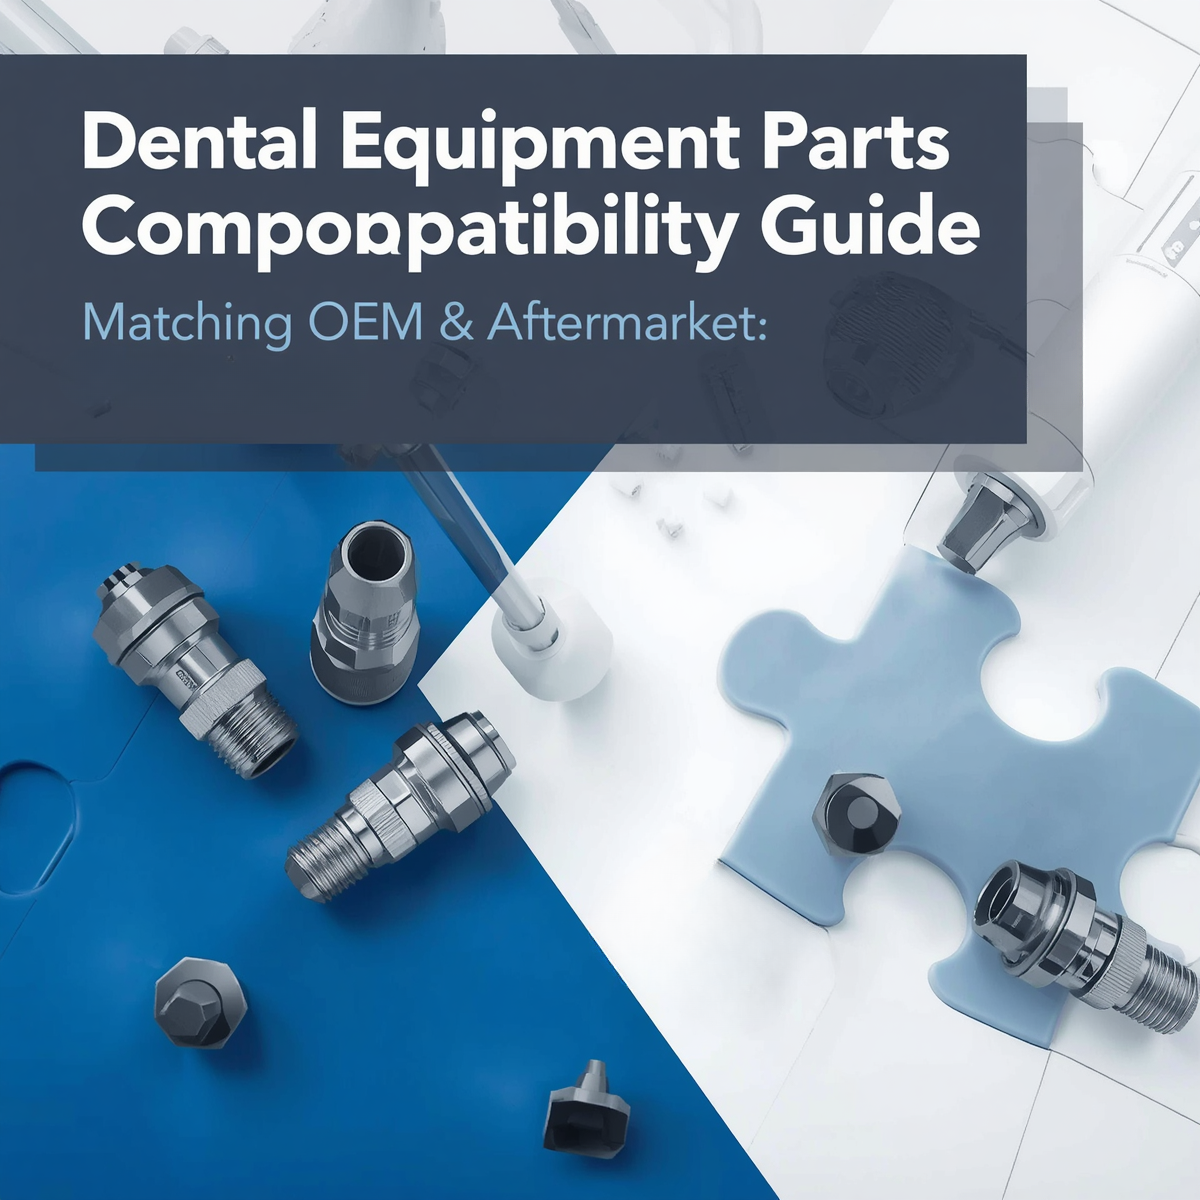
Dental Equipment Parts Compatibility Guide Matching OEM & Aftermarket
This dental equipment parts compatibility guide helps you find affordable, reliable replacement components for top major brands without compromising on fit, safety, or clinical performance. In a busy clinical environment, equipment downtime directly translates to lost revenue and disrupted patient schedules. When a delivery unit, utility system, or operatory light malfunctions, procuring the right fix shouldn’t feel like a guessing game. While ordering original equipment manufacturer (OEM) components is straightforward, navigating secondary market alternatives with technical precision can save you thousands in unnecessary overhead. OEM vs. Aftermarket: Understanding the Landscape Before mixing components within your operatory infrastructure, it is critical to understand the distinction between your sourcing options: OEM (Original Equipment Manufacturer): These are branded pieces built directly by companies like A-dec, Midmark, or Pelton & Crane. They are identical to the assets originally installed in your clinic. Aftermarket Components: Fabricated by specialized secondary manufacturers, these alternatives are designed to mirror the exact fit, thread pitch, and voltage specifications of original infrastructure at a lower cost. Cross-Compatible Hardware: Standardized industrial parts (such as specific pneumatic tubing, O-rings, and quick-disconnect fittings) that are universally utilized across multiple major dental brands. Technical Matching Rules for Core Equipment Categories To safely integrate non-OEM parts into your clinic, referencing a comprehensive dental equipment parts compatibility guide allows your administrative and maintenance teams to cross-reference three key engineering metrics before making a purchase. 1. Pneumatic & Hydraulic Fittings Dental delivery systems rely on intricate networks of pressurized lines. When sourcing replacement foot controls, blocks, or syringes, look beyond the brand name. Verify the thread standard—most North American systems utilize standard imperial threads (like 10-32 threads), whereas European imports often require metric configurations. 2. Electrical Specifications & Solenoids Solenoid valves control the flow of air and water to your handpieces. When substituting an aftermarket solenoid into a major delivery unit, always match the voltage (commonly 12V DC, 24V AC, or 24V DC) and wattage ratings. Installing an incorrect voltage component will instantly short out circuit boards or fail to open under pressure. 3. Mechanical Footprints & Handpiece Tubing Handpiece tubing is highly standardized based on ISO layouts (such as Midwest 4-hole or Borden 2-hole patterns). However, the internal configurations of the administrative control blocks they attach to vary. Ensure aftermarket tubing bundles specify compatibility with your exact model’s internal housing jacket. Major Brand Compatibility Blueprint When mixing and matching across manufacturers, utilizing a standardized dental equipment parts compatibility guide helps protect your equipment’s structural integrity. Use the baseline matrix below for common setups: System Category Major OEM Brands Safe Aftermarket Sourcing Criteria Delivery Units & Blocks A-dec, Pelton & Crane, Marus Match barbs and 10-32 thread dimensions; verify polyurethane line diameters. Autoclaves & Sterilizers Midmark (M9/M11), Tuttnauer Match door gasket profiles and cross-reference heating element wattages perfectly. Vacuum & Air Systems Ramvac, Air Techniques Utilize identical micron ratings for intake filters; check manifold port threading. Eliminating the Part Number Confusion The secret weapon of efficient clinic procurement is maintaining a comprehensive master cross-reference sheet. Whenever an internal component is successfully replaced, document the OEM part number alongside the verified aftermarket substitute. By leveraging this dental equipment parts compatibility guide, your group practice can drastically reduce dependency on sole-source distributors, lower your structural overhead, and establish a highly resilient supply chain that keeps your operatory rooms running flawlessly.
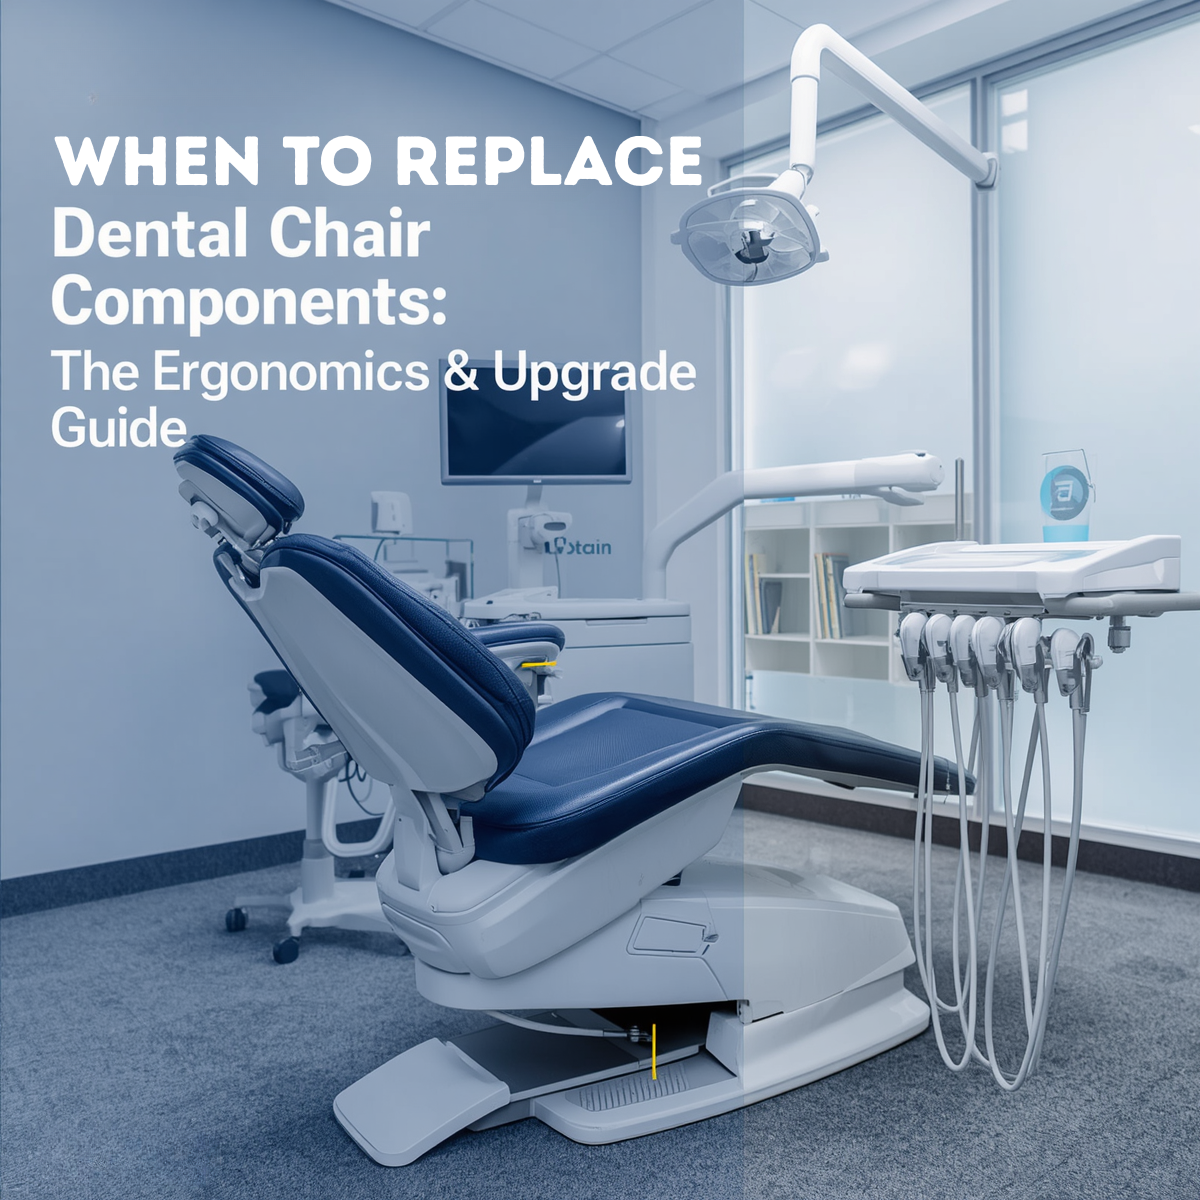
When to Replace Dental Chair Components: The Ergonomics & Upgrade Guide
Knowing when to replace dental chair components versus when to invest in a complete operatory upgrade can save both your physical health and your clinic’s capital budget. Dental professionals spend thousands of hours a year leaned over patients, making physical comfort a direct driver of career longevity. If you find yourself leaving the clinic each day with persistent neck, shoulder, or lower back pain, discovering actionable ways to address these physical warning signs will prevent serious injuries without draining your administrative resources. 3 Warning Signs Your Equipment Is Hurting Your Posture Ergonomic injuries rarely happen overnight; they accumulate through repetitive micro-movements caused by failing equipment. Watch out for these three red flags in your operatory: Sinking or Drifting Hydraulic Cylinders: If your doctor or assistant stool slowly loses height during a procedure, or if the patient chair drifts slightly after placement, you are constantly forcing your core muscles to compensate. Worn out or Compacted Foam Cushioning: Over years of use, the internal ergonomic foam in dental chairs loses its resilience. When cushioning compacts, it fails to support the patient’s lumbar or your own pelvic tilt, altering your line of sight and forcing you to slouch. Stiff, Unresponsive Articulation: If the chair’s double-articulating headrest or backrest hinges require physical force to adjust, clinicians often settle for a sub-optimal patient position, straining their neck and shoulders to compensate. The Financial Decision: Repair vs. Upgrade When facing equipment failures, you have to look at both the mechanical cost and the operational impact. Use this breakdown to determine the smartest financial route for your clinic. When It Makes Financial Sense to Repair / Part-Replace Don’t replace the whole chair if you don’t have to. You should focus specifically on identifying when to replace dental chair components individually if the core structural frame remains solid. If the mechanical lift mechanism, baseplate, and electronics are running flawlessly, buying individual parts is highly cost-effective. The fix is modular: Swapping out a dried-up armrest pad, replacing a hydraulic cylinder, or installing a new foot control valve takes minimal time and costs a fraction of a new system. You can update upholstery separately: If the chair works perfectly but looks dated or feels flat, ordering a pre-sewn replacement upholstery kit restores both the structural ergonomics and aesthetics without replacing the underlying machinery. When to Pivot to a Complete Operatory Upgrade Conversely, continuing to pour money into repairs is a losing strategy if the unit relies on obsolete parts. Sourcing rare engineering creates extensive downtime, and it makes more sense to transition to a new model rather than trying to figure out when to replace dental chair components that are no longer manufactured. Furthermore, older designs lack ultra-thin backrests found on modern systems. If a chair’s bulky design prevents you from tucking your knees completely under the patient, no component replacement will ever fix your posture. Component Replacement vs. Upgrade Checklist Scenario / Issue Smartest Financial Path Why? Cracked vinyl or compressed lumbar foam Replace Components / Upholstery Restores ergonomics and cosmetic appearance at a fraction of the cost. Slow fluid leaks or failing lift cylinder Mechanical Component Repair Simple hydraulic swaps extend the lift’s life by 5–10 years. Frequent circuit board blowouts on old units Complete Operatory Upgrade Sourcing rare electronics causes chronic downtime and high labor fees. Thick backrest preventing close clinical access Complete Operatory Upgrade It is a structural design flaw that permanently compromises operator ergonomics. Finding the Ergonomic Sweet Spot Protecting your body from career-ending musculoskeletal disorders requires a proactive approach to your operatory setup. By evaluating the structural integrity of your equipment and knowing precisely when to replace dental chair components, you can prolong the lifespan of your heavy assets while running a lean administrative budget. Keep your workspace highly responsive, address mechanical issues the moment they interfere with your posture, and budget for full upgrades only when old engineering stands in the way of proper clinical mechanics.
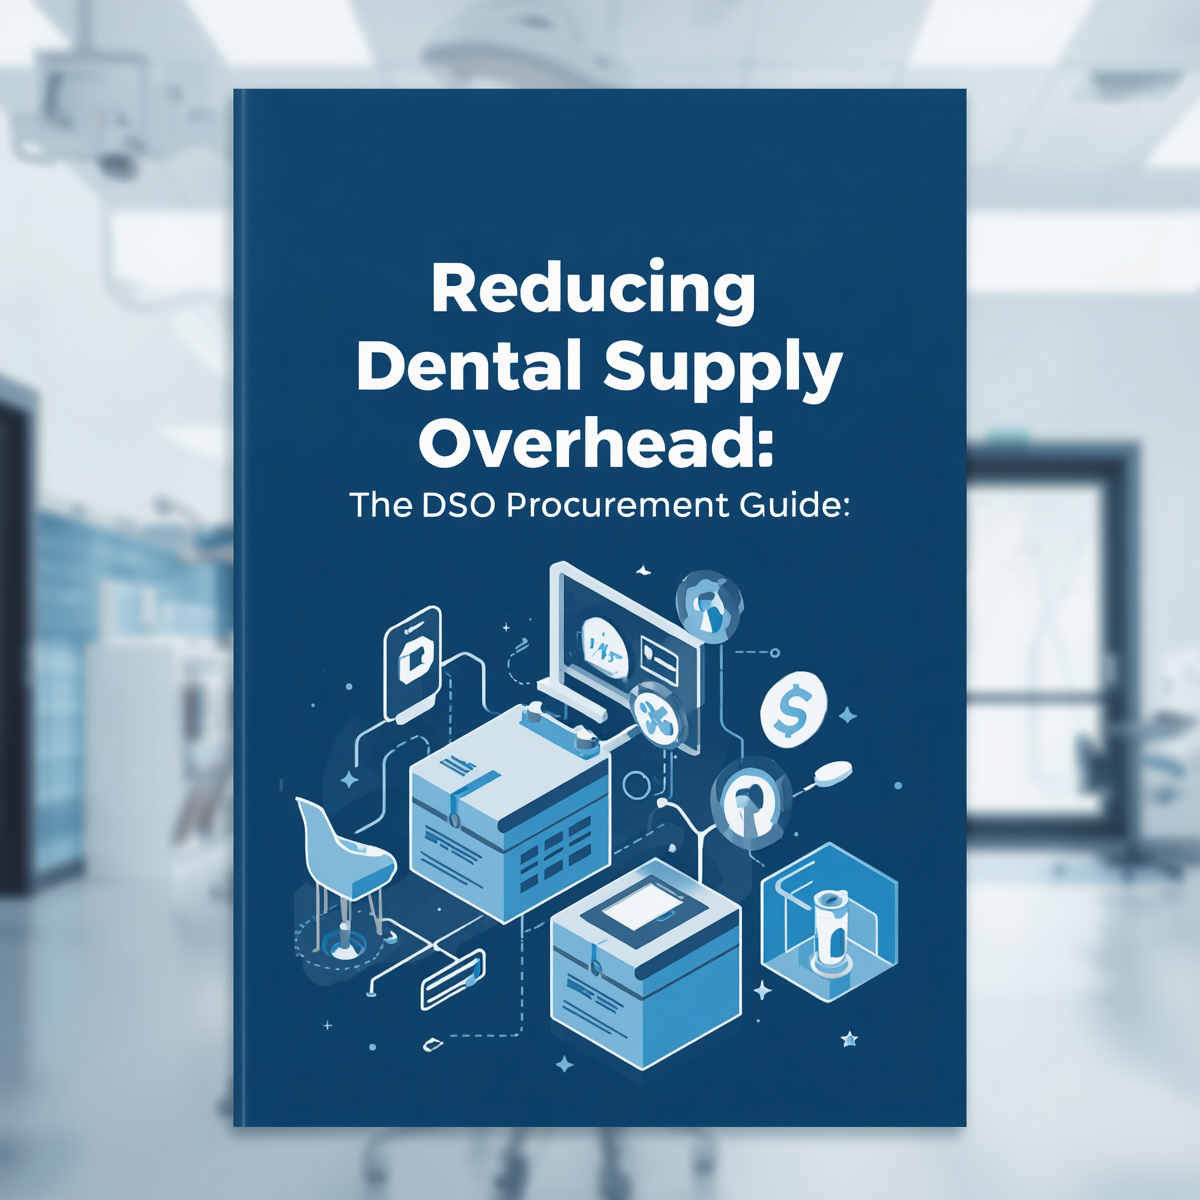
Reducing Dental Supply Overhead: The DSO Procurement Guide
For Dental Support Organizations (DSOs) and multi-location practices, reducing dental supply overhead is one of the fastest paths to increasing clinical profitability. While clinical excellence remains the top priority, administrative inefficiency can quietly drain your bottom line across multiple clinics. Discover actionable procurement strategies to optimize your collective buying power without sacrificing the quality of clinical care. Among all operational expenses, clinical inventory represents a massive opportunity for optimization. Discover actionable procurement strategies for reducing dental supply overhead across multi-location clinics and DSOs without sacrificing clinical quality. The Challenge of Decentralized Purchasing When dental practices scale from a single office to a multi-location network, purchasing habits often remain stuck in the past. If individual office managers or lead assistants are left to order supplies independently, your organization suffers from decentralized purchasing. This fragmentation leads to: Redundant Vendor Accounts: Multiple clinics ordering the exact same items from different distributors at varying price points. Lost Volume Discounts: Missing out on bulk pricing structures because your total order volume is fractured across individual transactions. Inventory Bloat: Over-ordering and product expiration due to a lack of centralized oversight. To shift from a reactive spending model to a strategic one, multi-location practices must leverage their collective buying power. Actionable Strategies for Reducing Dental Supply Overhead Implementing a centralized procurement framework doesn’t mean restricting your clinicians from getting the high-quality tools they need. Instead, it introduces efficiency into how those tools are acquired. 1. Consolidate Your Vendor Footprint The most effective method for reducing dental supply overhead is limiting the number of vendors you buy from. Instead of juggling dozens of niche suppliers, audit your historical spending and consolidate your purchasing power under a select few primary distributors. This instantly elevates your status to a high-volume account, giving you the leverage needed to negotiate preferred formulary pricing, waived shipping fees, and dedicated account support. 2. Establish a Standardized Product Formulary Work alongside your clinical directors to establish a standardized list of approved supplies—from impression materials to PPE. Standardizing your inventory narrows down the variety of products purchased across your organization. By driving higher volume toward fewer specific SKUs, you create a highly predictable purchasing pattern that major manufacturers are eager to discount. 3. Implement Centralized Procurement Software DSOs cannot effectively manage spending through manual spreadsheets. Utilizing a centralized inventory and procurement platform allows management to see exactly what is being spent at each location in real time. Approval Workflows: Set strict monthly budget caps for individual clinics, requiring corporate approval for orders that exceed thresholds. Automated Reordering: Leverage data to reorder items based on actual clinical utilization rather than guesswork. Multi-Location Procurement Comparison Procurement Strategy Small Group Practice (2–4 Locations) Scaled DSO (5+ Locations) Vendor Selection Preferred distributor agreements. Direct-to-manufacturer and formulary contracts. Ordering Process Standardized order guides per office. Centralized procurement software with strict approvals. Overhead Impact Eliminates immediate order duplication. Drives massive, predictable volume discounts across the board. Protecting Clinical Quality While Cutting Costs The primary objective of reducing dental supply overhead should never be a race to the bottom on price alone. Using sub-par materials leads to clinical failures, remake expenses, and chair-time delays—all of which cost far more than any upfront supply discount. True strategic sourcing focuses on maximizing vendor relationships and eliminating administrative waste. By streamlining your administrative processes and consolidating vendor spend, your DSO can achieve world-class clinical safety margins while running a lean, highly profitable operation.